A detailed description read here www.xanga.com Music Late Night Alumni : Sunrise Comes
Monday, December 26, 2011
Thursday, December 22, 2011
DeGERM-inator (Tm) Portable Ultraviolet Sanitizer
!±8±DeGERM-inator (Tm) Portable Ultraviolet Sanitizer
Brand : SpectrolineRate :

Price : $89.00
Post Date : Dec 22, 2011 11:57:06
Usually ships in 1-2 business days
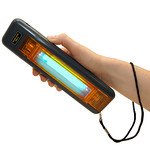
IN THE NEWSThe DeGERM-inator UV Sanitizer was tested in 2008 at major hospital. Tests were performed in a patient room to locate germ colonies. Next, a few seconds of Germicidal UV light from the DeGERM-inator was applied to sanitize the test areas. Retesting found NO ACTIVE GERM COLONIES remained, proving the DeGERM-inator works as advertised! So don't be fooled by larger wands...they're all imitations of the DeGERM-inator, all made overseas and none of them, not one, can outperform the DeGERM-inator. Why? Because ONLY the DeGERM-inator uses genuine Spectroline (R) fluorescent UV tubes, recognized as the most effective and used in professional laboratory settings world-wide. The patented DeGERM-inator Portable UV Sanitizer is the second generation of this breakthrough technology. It operates on 4 AA Alkaline or NiCad rechargeable batteries and comes with an ac adapter for extended use. The patented DeGERM-inator was the FIRST portable UV sanitizer offered anywhere in the world and it is THE ONLY portable UV Sanitizer that is made in America; designed, engineered and built right here in New York! Our competitors' lamps are all mass produced overseas. The DeGERM-inator will sanitize any object or surface on which germs may be a threat around the home, office or on the road! It will sterilize toothbrushes, cooking and eating utensils, baby's toys and nursery surfaces, food preparation surfaces; even a glass of drinking water....literally in seconds. To protect yourself and your family from contracting disease or illnesses, there is no faster or more effective way than by using the patented DeGERM-inator Portable UV Sanitizer. And for those who want to avoid or limit the use of toxic chemical cleaners and disinfectants, the DeGERM-inator is an excellent alternative. It is the ultimate "green" cleaning product. We say, "clean with soap and water...disinfect with LIGHT!" Manufacturer's full 1 year warranty....and the BEST customer service you ever had, guaranteed!
Prices Barbie Birthday Party Supplies Cuisinart Extreme Brew Ideas Revlon Flat Irons Free Shipping
Sunday, December 18, 2011
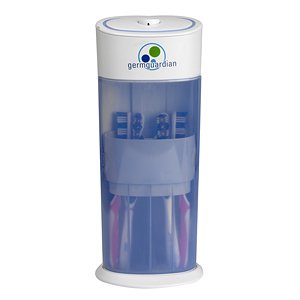
Germ Guardian Toothbrush Sanitizer Model TS3000 1 ct (Quantity of 1)
!±8± Germ Guardian Toothbrush Sanitizer Model TS3000 1 ct (Quantity of 1)
Brand : Germ Guardian | Rate : | Price :
Post Date : Dec 18, 2011 06:48:08 | Usually ships in 6-10 business days

| Price : Post Date : Dec 18, 2011 06:48:08 | Usually ships in 6-10 business days
More Specification..!!
Germ Guardian Toothbrush Sanitizer Model TS3000 1 ct (Quantity of 1)
Tuesday, December 13, 2011
Non Permanent Injectable Dermal Fillers
Dermal - of or relating to skin and especially to the dermis
Filler - thing or material used to fill a gap or increase bulk
There are permanent, semi-permanent and non-permanent cosmetic dermal fillers on the market today. Permanent and semi-permanent being implants, using various substances such as, soft form implants, and gore-tex implants, isolagen and fat transfers. These are carried out by a Doctor/Plastic Surgeon. These are more aggressive, invasive procedures.
Non-permanent dermal fillers are usually carried out by persons within the medical profession or by technicians, who have been properly trained to use the products.
Having provided dermal fillers now for 10 years, this article is based on my experience and should be used as a guide, to help you understand, the products and what to look for, when choosing a practitioner.
Dermal fillers have been on the market since the 70's, when Collagen, a bovine product, was developed by the company/manufacturer Collagen, now known as Inamed, and was used to fill out lines and wrinkles on the face, to give a smooth appearance to the skin.
Bovine/beef collagen requires a skin test followed by a 21-28 day period, for the results, before a treatment can be completed. However, even after waiting the necessary time, an allergy to the product can still develop. Allergies vary from mild to severe reactions. Once a reaction does occur, no further treatments should be performed using the product. Previously, when this happened, the client did not have a lot of other products to use, but that is not so today.
A Swedish company/manufacturer, Q-Med, revolutionised the industry, by introducing a man made hyaluronic acid product to the market, in the 90's.
With hyaluronic acid products skin testing is not necessary, so there is no need to wait to have a treatment. These types of products are becoming very popular for this reason.
Some clients may have a slight sensitivity to the product, meaning the area treated may take longer to settle in the skin, but future treatments can be carried out using the product. Reactions are rare, but can occur.
As these dermal fillers are not permanent, once you start using the product, and you wish to continue with the correction, further top up or maintenance treatments will be necessary. Six months is a good guide to go by although some clients may get longer wear out of the product. This will depends on many variables, such as, skin type, age, lifestyle, what product was used, amount of product used, and area the product was used in.
Most facial lines, indentations, cheek hollows, acne scars, lines by the sides of the eyes, building up or enhancing cheeksbones, chins and lips can be treated, but the areas just under the eyes can not. Chest lines and back of hands can be treated using rehydrating, hyaluronic products, to give moisture back to the skin.
It is recommended not to have a treatment done the same day of a special event, party, wedding, anniversary etc. Give the area time to settle first, so you may wish to have any treatments at least 1 -2 weeks prior to the event.
Most products come in ready filled - full and halve size syringes in various strengths, to cover fine, moderate to heavy lines. These syringes are for single use only, meaning a syringe to be used on one client not shared between clients. Example if a full syringe is not completely used the remaining product should be disposed of properly, not reused. There is a huge concern for cross contamination.
Also, you should not be asked to take any remaining product in the syringe home with you, to bring back at a later date for injection. Once the syringe is opened, then it is exposed to developing germs if kept for a period of time. This is not a safe method of practice.
Each person's response to dermal filler products is different. That is why a consultation is important, so the area of concern can be assessed. You discuss how much product will be needed, to either smooth out the lines of concern or plump up the lip. Also remember that each person's lines vary therefore, the price may vary from client to client.
As technology changes so will the products. New companies will come onto the market and they will have different products to offer. Established manufacturers will improve their already existing products, to become better and possibly longer lasting.
As a client you owe it to yourself to ensure that you are receiving a safe product and having a safe procedure. As there are a lot of Dermal Fillers ranging from animal to man made, on the market, with numerous practitioners offering these, choosing a practitioner can be very difficult. You may find out about one through a friend which is always helpful, however, if having to just find one then here are some suggestions.
o Ask if the practitioner is licensed to provide treatment.
o What are their qualifications and who trained them.
o Ask where the products come from and who provides them. If the practitioner is vague about these, then warning bells should start to ring.
o Ask for a brochure about the product and if it has any hidden additives that you should know about.
o Ask how long the practitioner has been using the product and what side effects can occur.
o Do not be intimidated to ask these necessary questions and if the practitioner get upset or indignant about these questions then that too, can be a warning sign.
There are unsafe products that are not to be used in certain country. Authorities are trying to control and manage this, but they can not always stop them being used. Also there are a lot of people providing products who do not have the necessary qualifications or training to provide them. Ensure you are getting a safe and correct treatment.
The most important aspect of all this is that, you, the client, are comfortable with the practitioner and confident that they will provide you with the best treatment you can have.
Visit www.facerejuvenate.com
Anolon Cookware Immediately Vtech Bugsby Fast Discount Wellborn Cabinets
Friday, December 9, 2011
Nano UV Small Disinfecting Scanner
!±8±Nano UV Small Disinfecting Scanner
Brand : ZadroRate :
Price :
Post Date : Dec 09, 2011 02:21:04
Usually ships in 1-2 business days
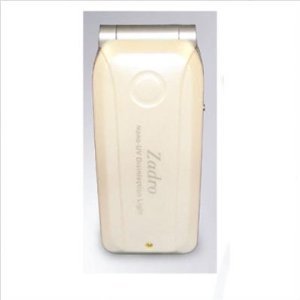
NANO01 Zadro nano UV small disinfecting scanner The nano UV disinfecting scanner is designed to stop the spread of infectious diseases by safely killing surface germs using proven Ultra Violet Light technology in a compact handheld device. It contains a Nano UV light proven to kill bacterial and viral DNA after a 10 second scan on any surface. Features: -Lightweight & convenient cell phone sized portable scanner. -Operates on 2 AAA batteries - Included. -Proven effective for home, office and travel use. -10 second timer switch for safe UV usage. -Overall dimensions: 6'' H x 7'' W x 2''D. -90-Day warranty against initial defects in material, mechanical, electrical and/or cosmetic workmanship.
Monday, December 5, 2011
Friday, December 2, 2011
Toilet Flushing
I once saw a demonstration on a television program that made quite an impression on me. A Microbiologist was trying to educate the viewers about the effects of toilet flushing. I guess he thought that the best way to get his ideas across was to demonstrate rather than just lecture.
He could not have chosen a more vivid way of presenting his information. He colored the toilet water by pouring some red dye into it. Seeing is believing they say and in this case, it was even a little shocking to watch.
When the scientist flushed the toilet, he purposely left the lid open. Many droplets sprayed out of the toilet, some traveled as far as twenty feet. They were red so you could see them everywhere, on the floor, on the countertop and anything that was on it, on towels, on rugs, and the toilet seat. The worst part was watching the red toilet water fall on toothbrushes that were on the counter. Now if this red water were only water, no harm would be done. But we all know that toilets are the germiest places we can think of. We've heard about the e. coli bacteria that cause havoc, illness, and recalls of food items. Well, they live in our toilets.
He then closed the toilet lid and flushed again. No water sprayed out. This simple demonstration was worth a thousand words. The lessons here are always flush the toilet with the lid down to avoid spraying germs and keep your toothbrush covered in case someone forgets to flush properly. When using a public restroom where there are no lids, turn your back to the toilet. The automatic flushers allow you to do this.
Think red, don't contaminate.
Empire Theatres Review Discount Snow Joe 622u1 Ryobi Blower Vac Best
Friday, November 25, 2011
Monday, November 21, 2011
10 Tips for Keeping Your Ceramic Tiles Looking Great
You enter the bathroom. You turn on the lights. You dream of having a nice, relaxing bath or a cold, invigorating shower. What you get instead is a strangled shriek and despair.
Yes, ceramic tiles sure brighten up any bathroom or kitchen with their artistic and wonderful designs. We all love that glossy finish and the pearl-like shine. But moldy and dirty ceramic tiles are a big turn off, especially to those who have a fetish about bathing in a spotlessly clean bathroom.
What about your kitchen? Can you bear placing your food atop a surface that looks dubious? Can you imagine the germs sticking themselves to your favorite vegetable? Ewww...
Alas, help from professional cleaners may cost us hundreds to thousands of dollars. That money can be better spent on other worthwhile items. All we need to know is how to properly care for our ceramic tiles so they'll keep looking clean and brand new.
1. Wipe 'Em Daily
Keep this as a mantra to yourself. This is easy enough to do, especially on kitchen counters, and it won't take you more than 15 minutes. All you need is a wiping cloth and some water. Always wipe surfaces after use. This is the best method from keeping dirt and debris from piling up. Dry tiles with a cloth or a sponge to prevent mildew formation.
2. Felt and Pads
Do you have heavy furniture made of wood, metal, aluminum or even plastic? Try to place felt or similar pads to their legs. This will help reduce the wear and tear on the tiles and will also facilitate easier shuffling and movement.
3. Protection with Mats
All houses have spots where heavy pivoting occurs. This could be your doorstep, or in front of the kitchen sink or the bathroom door. Situate mats of good quality to protect your tiles from pressure, weight or friction. These mats can also reduce dirt, grit, sand and oil that is deposited in your tiles since the fibers of the mat trap them nicely.
Make sure to wash the mats every once in a while to remove the deposits. Replace worn mats if possible.
4. Weekly Appointments with the Damp Mop
Aside from the daily regimen of wiping them, your ceramic tiles can also benefit a great deal from mopping them with a solution of vinegar and water. Mix ½ cup of vinegar to a gallon or so of water and use this to mop your floor.
Let it sit for 5-10 minutes. Then mop the floor again with tap water to remove most of the vinegar and odor. The mild acidity of the vinegar will promote the death of mildew. Also, refrain from using soaps on the tiles as they will dull they surface.
5. Kiss Grime Away With Bleach
Ooh, your neighbor tracked his mud-soiled boots on your spotless white tiles. Even though you want to beat him up bad, you might want to hold in the urge because you need to act on that dirt, fast! Wipe off most of the dirt with a wet cloth. If there are stubborn streaks remaining on your beautiful tiles, it's time to bring out the bleach.
Add about half a liter of bleach to a bucketful of water. Make sure you have your rubber gloves on, since bleach is very harsh on the skin. Mop the floor with the solution and let it sit for 15-20 minutes. After that, try rinsing it with water.
If stains still remain, repeat the process until you get back your shiny, sparkly tile. Remember to wipe it dry with a clean cloth after the procedure.
6. Clean that grout!
Grout is the cemented space between your tiles. White tiles usually have a white grout and white grout is a breeding ground for mildew, molds and dirt.
If you already spot mild discolorations on your growth, it's time to mix about ¼ of a mild detergent to a bucketful of water. Splash some on the grout and let it sit for 5-10 minutes. After that, try scrubbing the grout with a soft cloth. The color should fade away quickly. Again, wipe your tiles with a dry cloth after the procedure.
7. Abrade me not
NEVER use abrasives and harsh soaps on your tiles. They reduce the shine and polish as well as make cracks and pits that would be a more ideal ground for dirt and grime to settle in. Use only mild soaps and detergents. Always dilute strong acids before using them on your tiles.
8. Can you hand me that toothbrush?
Stubborn dirt and grime in your grouts? Well it's time to give them a little push. This will involve getting down on you hands and knees but it's all worth it when you see your tiles looking like they're newly installed.
Again, make a mild detergent solution from ¼ cup of detergent to a bucketful of water. You can add a small amount of bleach if you want, but remember to protect your hands and knees. Let it sit for a few minutes.
After that, get a used toothbrush and start scrubbing your grout. Be careful not to damage the side of the tiles. The ugly dirt should give way even with only a little force. Rinse with water and wipe dry.
9. Stock on Drying Cloth and Sponges
You might have noticed that every procedure call for wiping your tiles dry. That's because there is no sense in performing the task yet leaving molds and mildew for a chance to attack. Remember that these organisms grow best in moist surroundings.
With all that cleaning going on, you'll get tired from washing and drying the same cloth everyday so stock up for convenience.
10. Be Patient.
The thing is, people look up handy tips and tricks to cleaning their tiles. But some mail back, feeling very unsatisfied with the results. The usual problem here is PATIENCE. If a specific procedure tells you to wait for 15 minutes, it's best to follow it. See, waiting allows the solution to seep into the layers of dirt and grime. The solution loosens up impacted dirt and facilitates removal. This is the key to a successful cleaning venture.
With that said, have fun in cleaning and remember: Always wipe it dry.
Thursday, November 3, 2011
Monday, October 31, 2011
Zadro Nano UV Disinfection Light
!±8± Zadro Nano UV Disinfection Light

Brand : Zadro | Rate : | Price : $57.04
Post Date : Oct 31, 2011 16:38:25 | Usually ships in 1-2 business days
| Price : $57.04Post Date : Oct 31, 2011 16:38:25 | Usually ships in 1-2 business days
- Provides an easier and faster way to disinfect computer keyboards, phones and other equipment
- Ideal for sanitizing items that are prone to collecting germs
- Makes it easy to sanitize dirty airline trays and laboratories
- Cell phones become 99.99% germ free with a quick 10-second sweep
- Operates on 2 AAA batteries (included)
More Specification..!!
Zadro Nano UV Disinfection Light
Skip Hop Duo Double Diaper Bag Buy Online Stanley Fatmax Level Sale Prices Kashi Golean Cereal
Thursday, October 27, 2011
High Quanlity New Samsonic S450 Deluxe Plus Pursonic Rechargeable Electric Toothbrush 30000 Brush Strokes/Minute
!±8±High Quanlity New Samsonic S450 Deluxe Plus Pursonic Rechargeable Electric Toothbrush 30000 Brush Strokes/Minute
Brand : SamsonicRate :
Price : $74.88
Post Date : Oct 27, 2011 18:35:21
Usually ships in 1-2 business days
100% safe & secure shopping; Superior customer service.
Subscribe to:
Comments (Atom)
|
|
|
|
|
 |
 |
 |
 |
 |
 |
 |
 |